How to Give Yourself a Buzz Cut at Home: Step-by-Step Tutorial
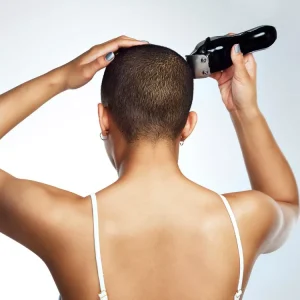
Giving yourself a buzz cut might sound super intimidating, but with the right tools and a bit of know-how, you can get the job done from the comfort of your own home within 15 minutes. To help you out even further, we tapped celebrity barbers for their pro tips and put together our very own step-by-step guide to DIY-ing the look below.
MEET THE EXPERT
Rodrick Samuels is a barber, educator, and activist. He is also the director of Hair Lab Detroit Barber School.
Candice Ryan is a celebrity barber, Bevel Brand ambassador, men’s grooming specialist, and the owner of Mz Ryan Cutz.
Jomo Kenyatta is a celebrity barber, men’s grooming specialist, and Bevel brand ambassador.
Keep scrolling for the 411 on how to give yourself a buzz cut at home.
Gather Supplies
- A good hair clipper
- Attachment combs for the hair clipper
- Hair trimmers for detail work
- Comb (perhaps the last time you’ll need one of these)
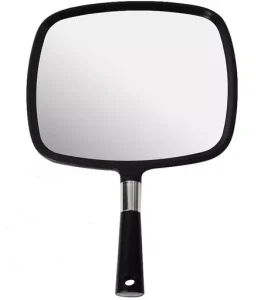
- Hand mirror (or swing-arm mirror)
- The location of the nearest salon or barber (just in case)
- A steady hand and a bit of patience
- A broom and dustpan
Invest in good tools, and keep your clippers well-oiled and maintained. Paying a few extra dollars for a good clipper, such as the Oster Fast Feed ($76), will help produce a better result. Both Ryan and Kenyetta recommend the Bevel Pro Clipper + Trimmer ($264), which allows you to control the length and level you want, with an additional trimmer and liner to finish the edge up. If you decide to go for a buzz all the way to the skin, a good balding clipper is also a great investment.
Byrdie Tip
To avoid getting hair all over the place, Ryan recommends, “Find a place where you can clean up easily, such as hard floors. I don’t recommend doing it on a carpet or rugs unless you put down something to protect the floor and get yourself a cap or something to cover you when the hair falls.”
Choose a Length
A 3-2-1 buzz cut has a No. 3 guard on top, No. 2 on the sides, and No. 1 around the edges. This will leave the hair about 3/8 inch long on top, tapering down to 1/2 inch on the sides and back and then finishing tighter at the hairline. Alternatively, Samuels suggests using a No. 2 guard against the grain for the entire buzz. The shorter you buzz it, the harder it will be to mess up or end up with an uneven result.
Wash and Dry Hair + Set Up Your Station
To achieve the best results, it’s helpful to start with a clean, dry head of hair—hair will be more difficult to cut evenly if it has product in it or is flat after sleeping or wearing a hat. Kenyatta and Ryan both recommend setting yourself up with a 360-degree or three-way mirror set up, so you can see all sides and the back of your head with ease, not to mention keep your hands free.
Buzz the Sides
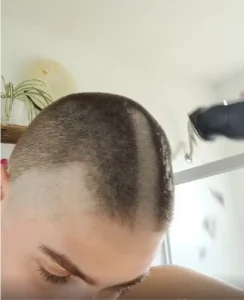
When it comes to buzzing your hair, where do you begin? Does it even matter? According to Samuels, “You should start cutting on the sides—either temple—and work your way around to the other side.” Replace the attachment on the clipper with a No. 2 (1/4 inch). Keeping the clipper guard flat against the head, start at the sideburn area, and clip up the head to just past the start of the buzzed-down top section. Run the clipper in a straight line up past the part where the head begins to round at the top to provide a smooth blend between the sides and the top. You’ll know when to stop shaving because the clipper will leave the head. If you see any lines between the two sections, rocking the clipper outward in a scooping motion will help you get a good blend. Repeat in strips on both sides until it’s complete, and go over any missed spots.
Byrdie Tip
Don’t rush the cut. Be careful and proceed slowly to keep from making a mistake. Make sure your guards are on securely. If the clipper guard pops off, you’ll end up with a bald patch that can only be fixed by shaving your head, so make sure your guards are firmly attached before you proceed.
Buzz the Top
Next, place the No. 3 (3/8-inch) attachment on the clipper or continue with the No. 2 for an all-around even look. Holding the clipper guard flat against your forehead, begin cutting from front to back. Move the clipper back down the middle of the head slowly past the crown. Repeat in strips until the entire top is clipped down; cut everything to just past the point where the head rounds into the sides. You might need to go over it a few times to get it all even; making a few passes from side-to-side helps. Pay extra attention to the crown. Since hair grows in a circular pattern at the crown, you’ll need to buzz from all directions to get it all cut.
Buzz the Back
Mirrorvana Large Hand Mirror with Comfy Handle $15.00
Stand between the vanity mirror and your hand or swing-arm mirror. If you don’t have a mirror, Kenyatta recommends, “If you don’t have 360° visual, hold your phone in front of you or put it on a stand while the mirror is behind you. At this point you should be able have full view of the back of your head.” For best results, your back should be facing the vanity mirror while you look into the hand mirror. This will allow you to see the entire back of your head. Keeping the No. 2 on the clipper, with the clipper guard flat against your head, start buzzing from the bottom of the neck all the way up the head until just past the clipped part on top. Like the sides, continue up the head in a straight line, allowing the round of the head near the top to provide a natural blend. Repeat in strips until the entire back is cut.
Taper the Edges
Using the No. 1 (1/8-inch) attachment, taper in the edges. To do this, start at the sideburn and clip up to the top of the ear, rocking the clipper out in a scooping motion. This will blend into the No. 2 length section (Alternatively, you can keep using the No. 2 guard, but keep in mind that this won’t give you the tapered edges). Continue over the ear (it will be helpful to bend the ear over flat with your other hand to make room and allow you to see what you’re doing) on each side. Once the sides are complete, turn around and do the same to the back, running the clipper up the back of the head and rocking it out at about ear level. The shortest part of the back will go up to meet the shortest part of the sides.
Detail the Cut
Using your trimmer, you’ll now trim your sideburns. For a polished look, shave the back of your neck by creating a line and shaving everything underneath completely. Holding your trimmer with the teeth of the blade pointing at your skin (the blade is parallel to the floor with the bottom of the blade facing up) will allow you to cut a clean line. Holding the trimmer with the bottom of the blade flat against your skin (with the teeth facing up) will allow you to shave everything underneath the line you created. Follow the natural hairline as closely as possible.
Clean Up
Once you’ve finished the cut, inspect your entire head carefully for any missed spots or uneven places. Go back over anything that looks out of place. Pay close attention to the back and crown area, because these are often the areas most people miss. Sweep up, shower, run your hands through your hair, and enjoy your new buzz. Even though you won’t need to style your hair, you’ll still need to maintain some basic upkeep. Buzz your head about every two weeks to keep your look fresh.

